Step-by-step Tutorial
01
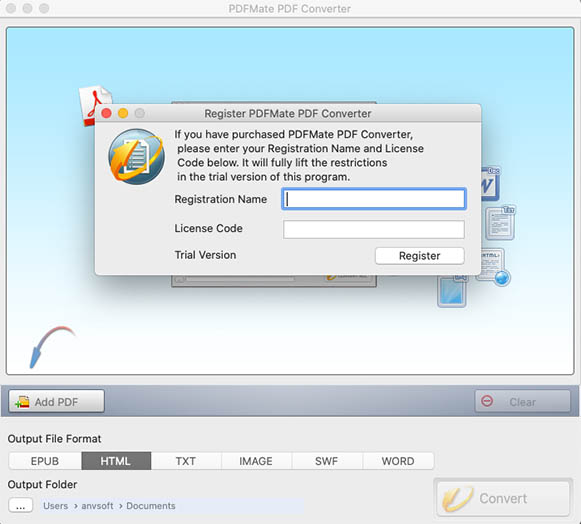
Registration
Step 1. Launch PDFMate PDF Converter for Mac.
Step 2. Click the "PDFMate PDF Converter" button (on the upper left) > Register. There will be a registration popup dialog, where you can copy and paste your registration email and license code.
Step 3. Copy and paste your registration e-mail and code into the dialog.
Note: The registration information is case-sensitive. Please do not add spaces at the beginning or the end of the registration e-mail and code.
02
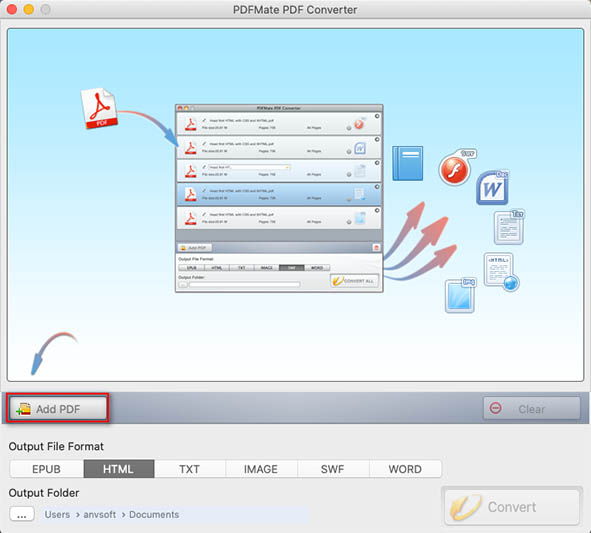
Add PDF files or Folders
Please click "Add PDF" button on the window, browse, select and add your PDF file(s) to PDFMate PDF Converter for Mac. You can also specify any page or page range of the PDF document(s) for conversion.
03
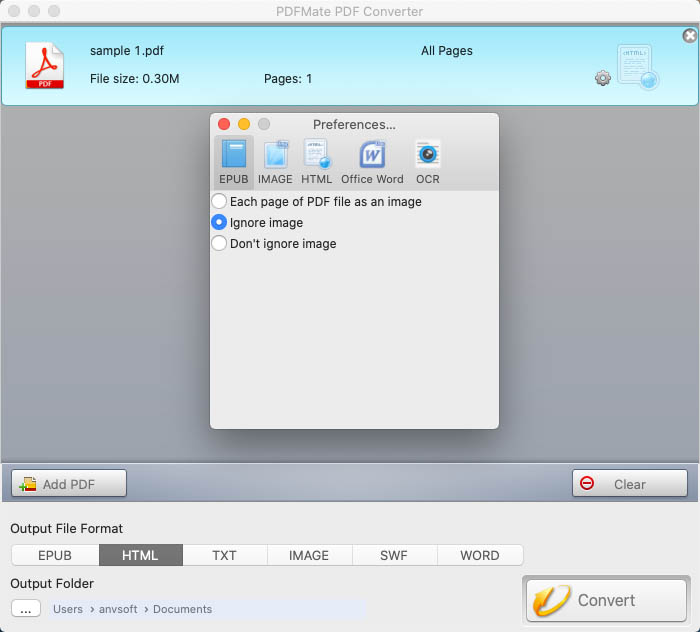
Preferences
Click "PDFMate PDF Converter" on the upper left corner and select "Preferences" to customize basic settings. For detailed information about each setting option, please refer to the list below.
OCR Setting: Choose between 'Enable OCR' and 'Disable OCR' to turn on/off the OCR mode.
PDF to EPUB Setting: Convert PDF file(s) to EPUB format with or without image(s).
PDF to Image Setting: Convert PDF file(s) in each page of PDF file as an image or extract only images of the original PDF files.
PDF to HTML Setting: Convert the PDF to HTML file(s) with or without image(s).
PDF to Word Setting: Convert PDF file(s) to Word 2003 (*.doc) or 2007 (*.docx).
04
Output format and path
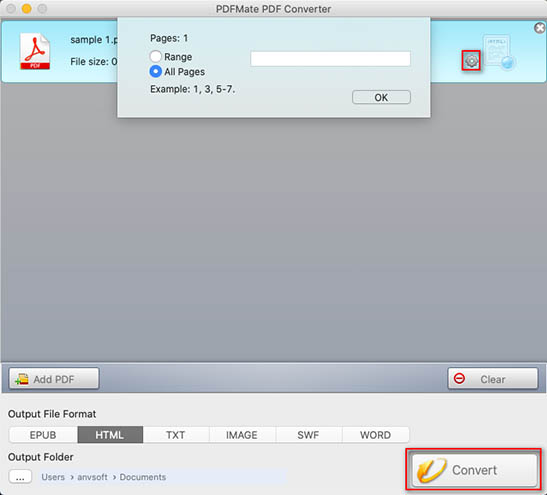
Click on the 'setting' button and you can either specific a page to convert or type the page range for conversion. Press OK to confirm it.
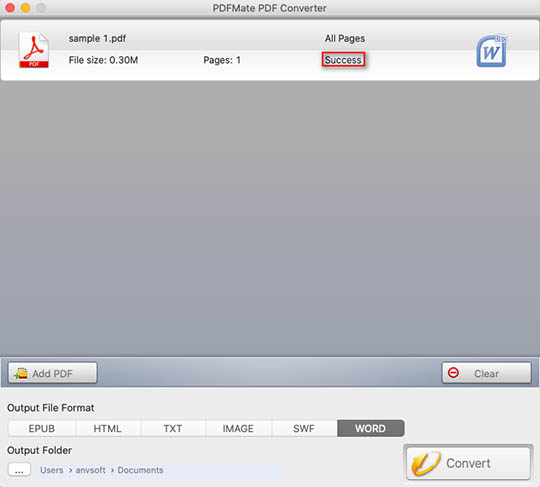
Choose the output format (EPUB, HTML, TXT, IMAGE, SWF, and WORD) for the conversion and set the output path to save the converted files.
05
Conversion
Click the 'Convert' button to start the conversion. When PDFMate PDF Converter for Mac complete the conversion, the output folder would pop up automatically.
